Integrations
Next.js custom Image loader for Nitrogen AIO
This documentation explains how to create a custom image loader in Next.js to modify image URLs for the Nitrogen AIO. This allows you to optimize images specifically for Nitrogen AIO delivery.
Prerequisites
- You must have a domain configured on Nitrogen
- You must have AIO enabled, please refer this article.
- Basic understanding of Next.js and Nitrogen AIO.
- Node.js and npm (or yarn) installed on your development machine.
Steps
-
Install package :
-
Update Next.js Configuration:
Open your Next.js configuration file, typically located at
next.config.jsin the root directory of your project. Add the following configuration under theimagessection:const nextConfig = { images: { // ... other image configurations loader: 'custom', loaderFile: 'node_modules/@n7.io/nitrogen-aio-nextjs-loader/aio-loader.js', }, }; export default nextConfig;This configuration tells Next.js to use your custom
aioLoaderfunction for all image optimization tasks. -
Using the Custom Image Loader: Now you can use the
srcattribute in your Next.js components to specify image URLs, and the custom loader will automatically modify them for Nitrogen AIO. For example:import Image from 'next/image'; function MyComponent() { return ( <Image src="/images/my-image.jpg" alt="My image" width={800} /> ); }In this example, the image URL
/images/my-image.jpgwill be transformed to/images/my-image.jpg?aio=w-800before being delivered to the browser. Nitrogen AIO will then resize the image to a width of 800 pixels or nearest bucket.
Additional Notes:
- Do not put
aioparameter insrcattribute, as the loader constructs this parameter based on thewidthandheightattributes ofImagecomponent. If both found, AIO will throw 400 error (Query deserialize error: duplicate fieldaio`). - Loader will not work on HTML's
imgtag, it will apply only toImagecomponent.
Mobile App Image Optimization using Nitrogen AIO
This documentation explains which Accept Headers needs to be included for Images in Mobile App. This allows you to optimize images specifically for Nitrogen AIO delivery.
Prerequisites
- You must have a domain configured on Nitrogen
- You must have AIO enabled, please refer this article.
- Basic understanding of Mobile App Image Properties and Nitrogen AIO.
Steps
Add the following mandatory Headers on outgoing image requests. Please modify the values based on the user's mobile device and network configuration:
X-Device-Dpr = 1
X-Device-Format = image/avif,image/webp,image/jpeg,image/png
X-Device-Ram = 4096
X-Device-Width = 980
X-Device-Bandwidth = 10
X-Device-Type = app
Description:
- X-Device-Dpr: Specifies the screen's device pixel ratio to serve the right image quality.
- X-Device-Bandwidth: Indicates the device’s current internet speed in megabytes per second (Mbps).
- X-Device-Width: Tells the server the ideal image width of the device screen (in pixels).
- X-Device-Ram: Shares how much available RAM the device has (in MBs).
- X-Device-Format: Specifies the image formats supported and available on the device for optimized delivery, such as webp or avif.
- X-Device-Type: Identifies if the request is coming from a mobile app by using the value "app".
Shopify integration
Prerequisites
- You should have access to Shopify admin portal (admin.shopify.com)
- You should have a Nitrogen AIO endpoint available. If you have not received it - check with the Nitrogen POC person in contact with you, OR mail to support@n7.io.
Steps
- Creating AIO settings
- Open https://admin.shopify.com/
- Go to
Sales channels > Online store themes > Themesmenu from left side. Edit code for your current theme by clicking on...menu and then clickingEdit codemenu.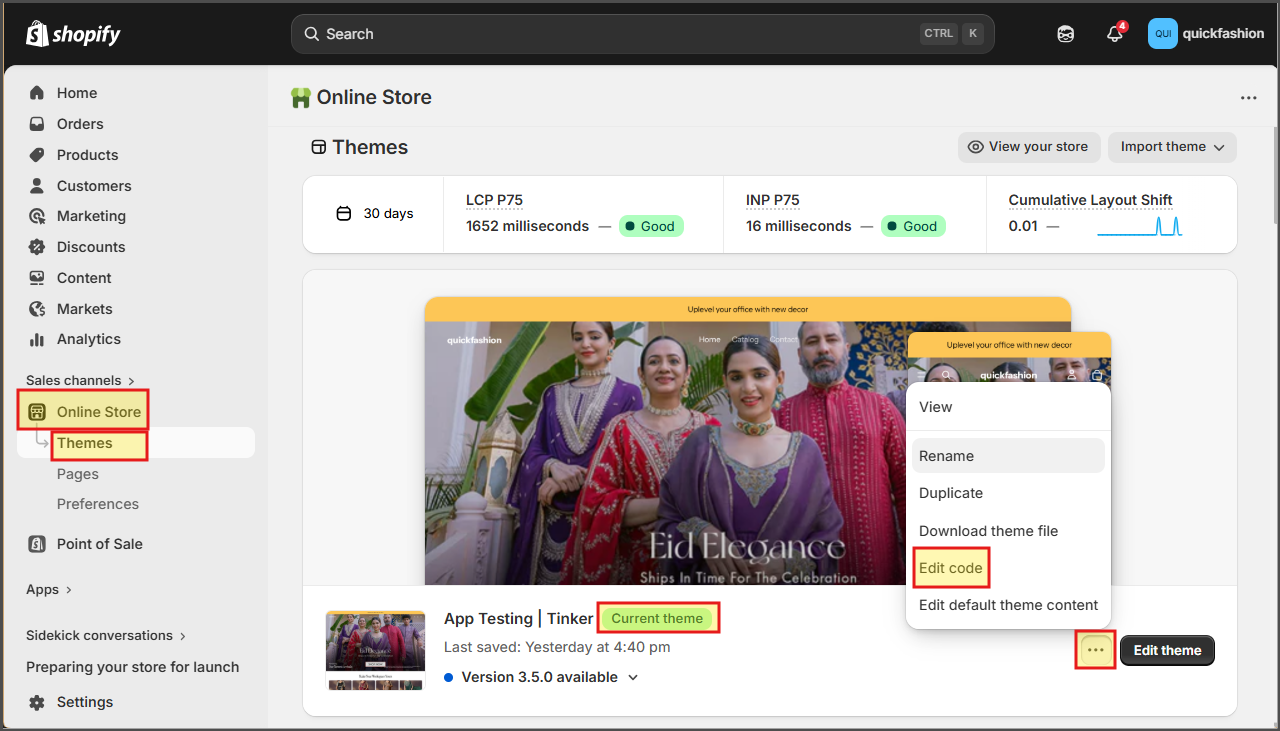
- Select
configfolder and then opensettings_schema.jsonfile. Then add our AIO setting from this file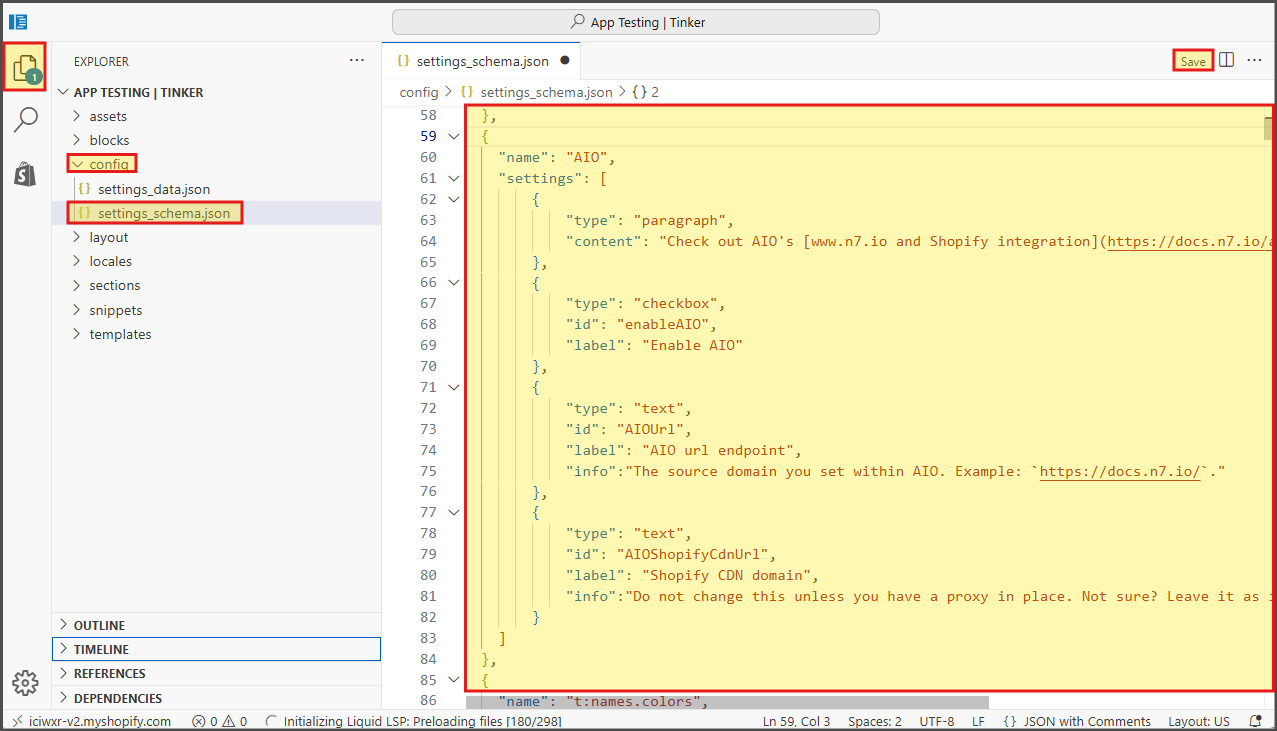
- Now select
Snippetsfolder, and copy aio.liquid and aio-image.liquid files to it.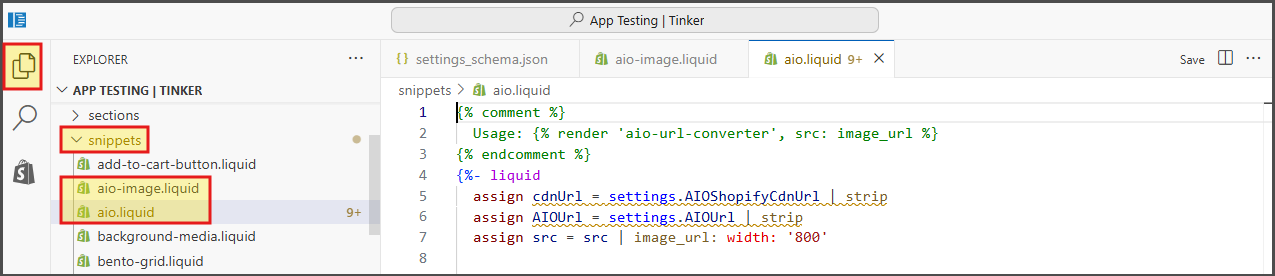
- Configuring AIO
- Open https://admin.shopify.com/
- Go to
Sales channels > Online store themes > Themesmenu from left side. Click onEdit themebutton next to yourCurrent themementioned there.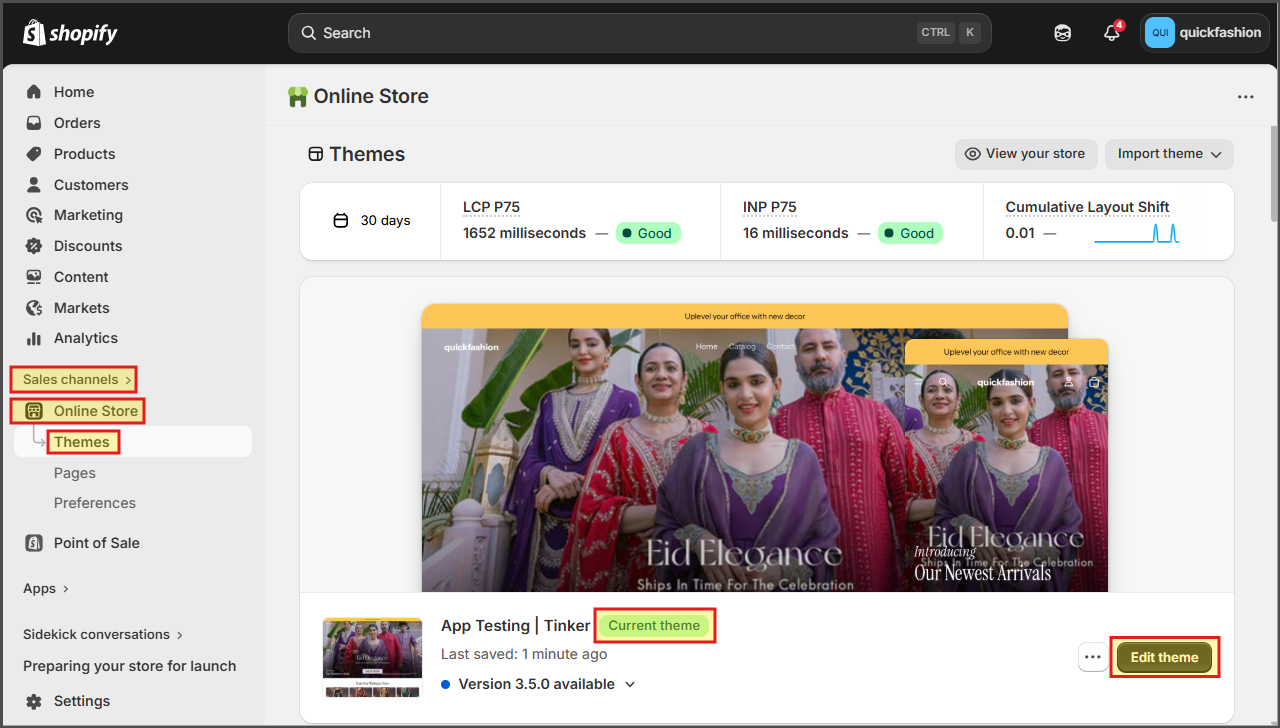
- Click on
settingsmenu at top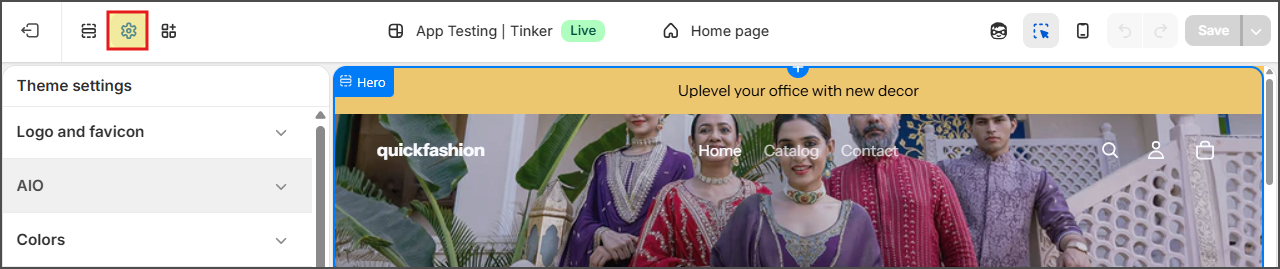
- Go to
AIOmenu, and enable it. Then add the AIO endpoint shared with you, and your current image domain name.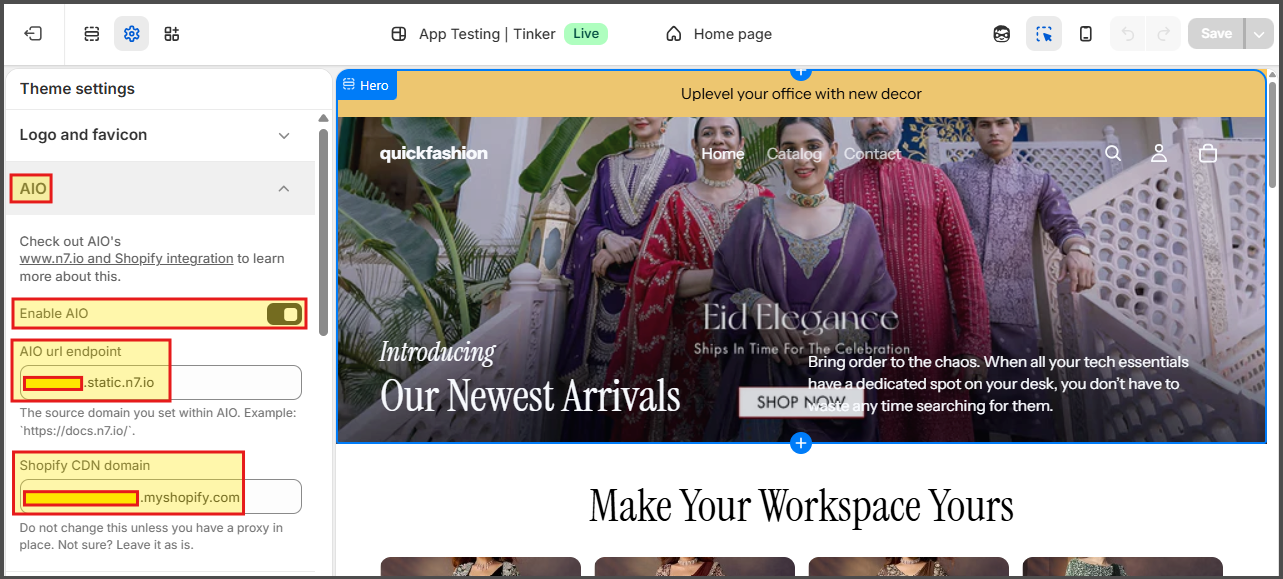
- Using AIO
- Open https://admin.shopify.com/
- Go to
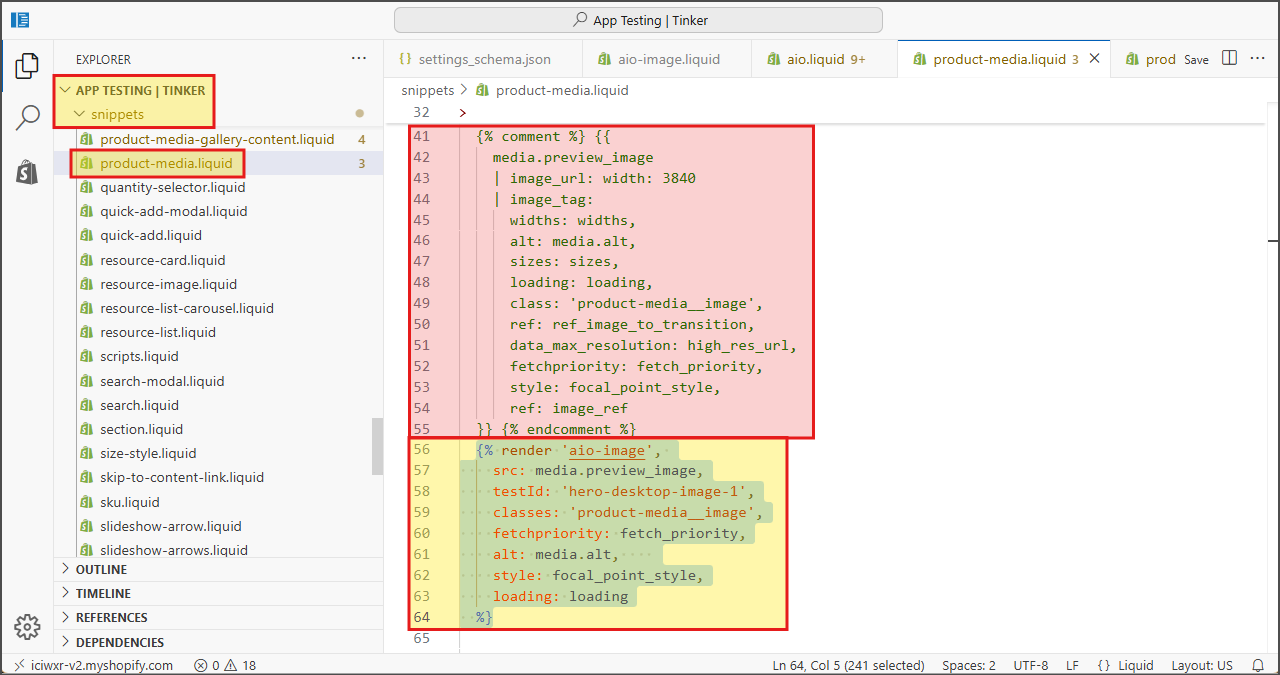
Sales channels > Online store themes > Themesmenu from left side. Edit code for your current theme by clicking on...menu and then clickingEdit codemenu. - Now, in all the liquid files where you have added images, you need to replace the current
imagetags withaio-imagetags with respective settings. You can find sample code in this file